
The Paradox IP150 Internet Module is a LAN based communication module that enables you to control and monitor your Paradox security system over a LAN or the internet through any web browser (e.g. Internet Explorer) or programatically via a home automation platform such as Home Assistant.
In this blog, I will take you through how to setup the Paradox IP150 so that you can control your alarm system via a web browser or control and view the states of your alarm sensors through Home Assistant.
IMPORTANT: The IP150 module should only be configured by the installer or a qualified network administrator. For more information on module configuration, consult the IP150 Reference and Installation Manual.
Step 1: Connecting the Paradox IP150 to your Paradox Alarm Board
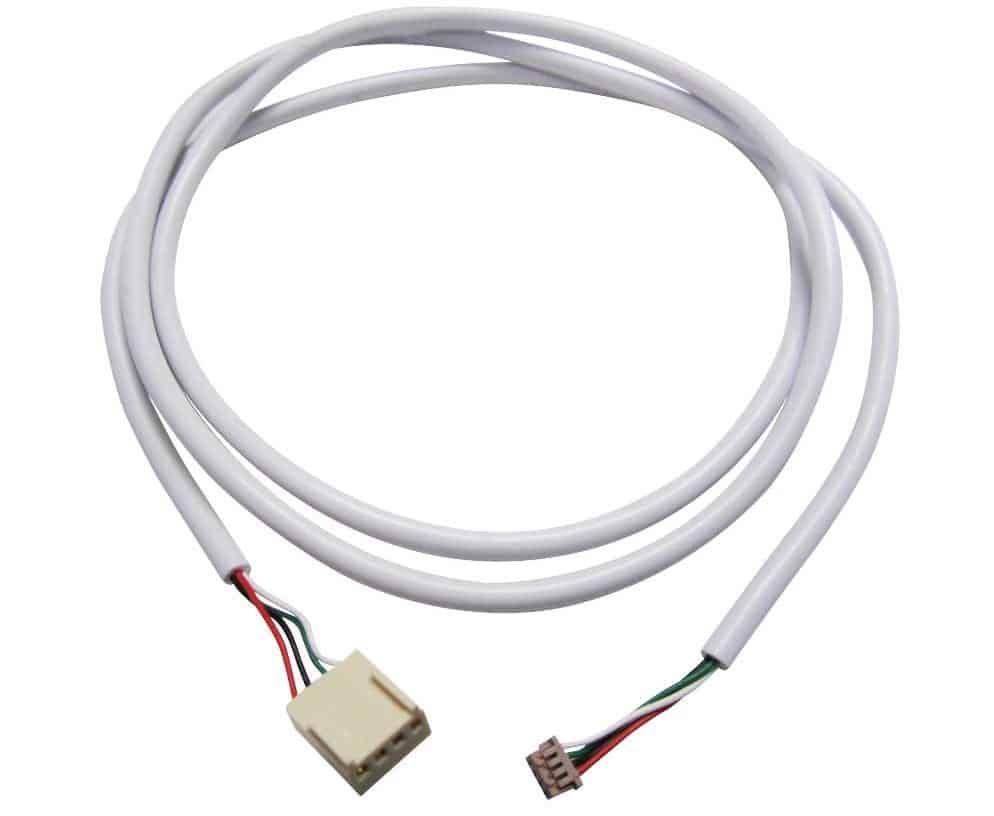
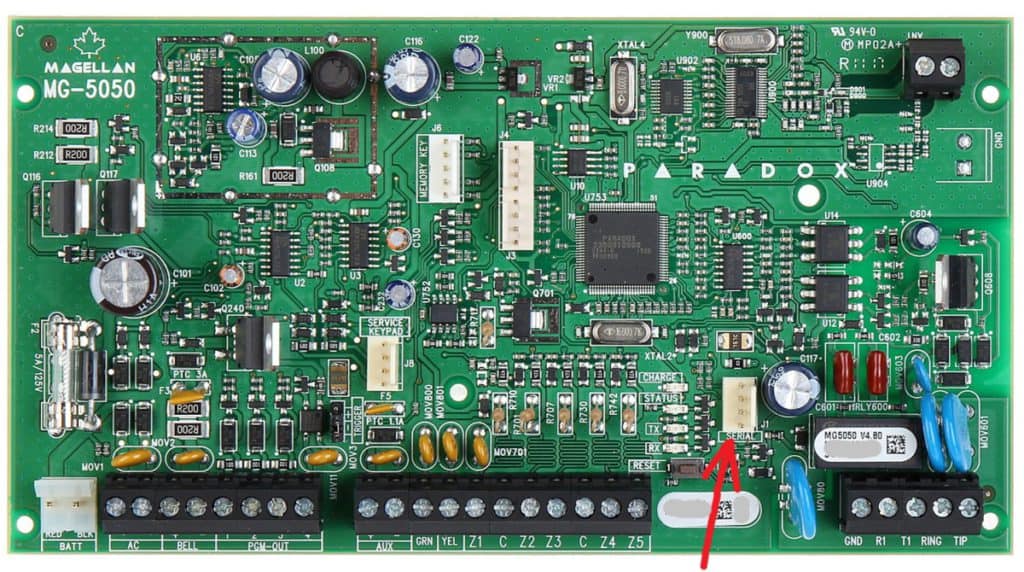
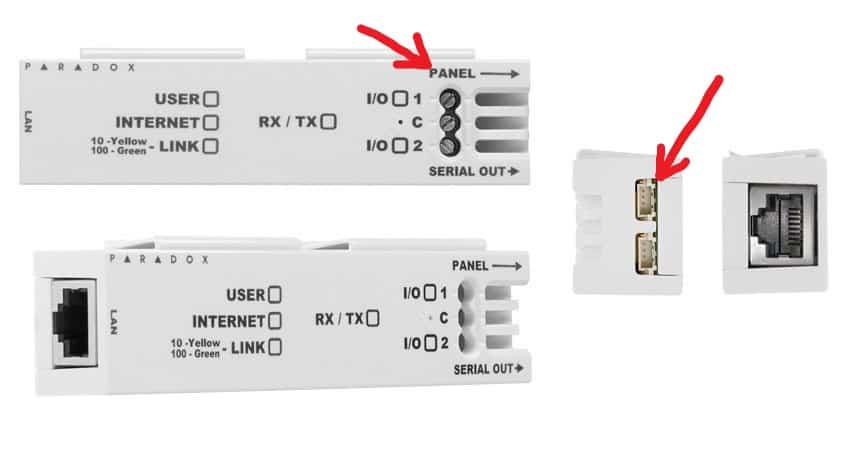
The first step in the setup is to connect the Paradox IP150 to your Paradox Alarm Board. This is done by plugging in the smaller of the two plugs of the supplied cable into the ‘Panel’ port of Paradox IP150 and the larger plug into the ‘Serial’ port of your Paradox alarm system board. I am using a Paradox Magellan MG5050 alarm panel so the images below correspond with this unit.
Step 2: Connecting the Paradox IP150 to your wired Local Area Network (LAN)
The Paradox IP150 is equipped with a LAN/Ethernet port. This means that you will need to run an Ethernet cable from your router or switch to the cabinet that houses your alarm system control panel. In my case, I wired a switch into a cupboard that houses my Paradox Magellan MG5050 alarm panel and then connected my POE switch to a router in my office via an Ethernet cable. As this cupboard is at a central point in my house, it was also convenient location to run other Ethernet cables off to my Hikvision Surveillance cameras and Unifi Access Points.
Step 3: Finding the IP address of your Paradox IP150
You can find the IP address in your router DHCP by reviewing all the devices connected to your network and looking for the Paradox IP150. Alternatively, I chose to download the Fing iOS or Android app and scan my network for connected devices. Once you find the new IP address on your network, copy this IP address and paste it into your web browser to open up the Paradox IP150’s web interface.
Step 4: Connecting to the Paradox IP150 Internet Module
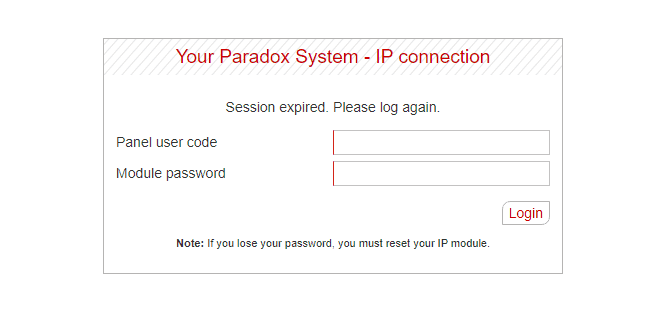
When you enter the IP address of your Paradox IP150 into a browser, the following login screen will load.
- Panel user code: This is the pin number that you normally use to arm and disarm your alarm system via the keypad.
- Module password: The default password is “paradox” and you will be prompted to change this after your first login.
- Paradox DNS Site ID: The instruction manual says your Site ID is required and provided by your installer but I did not need it. I think it is only necessary is you are connecting to the paradoxmyhome.com which I chose not to do. See why below.
Make a note of the ‘Module password’ because you will need this and the ‘Panel use code’ if you are going to connect your Paradox IP150 to Home Assistant.
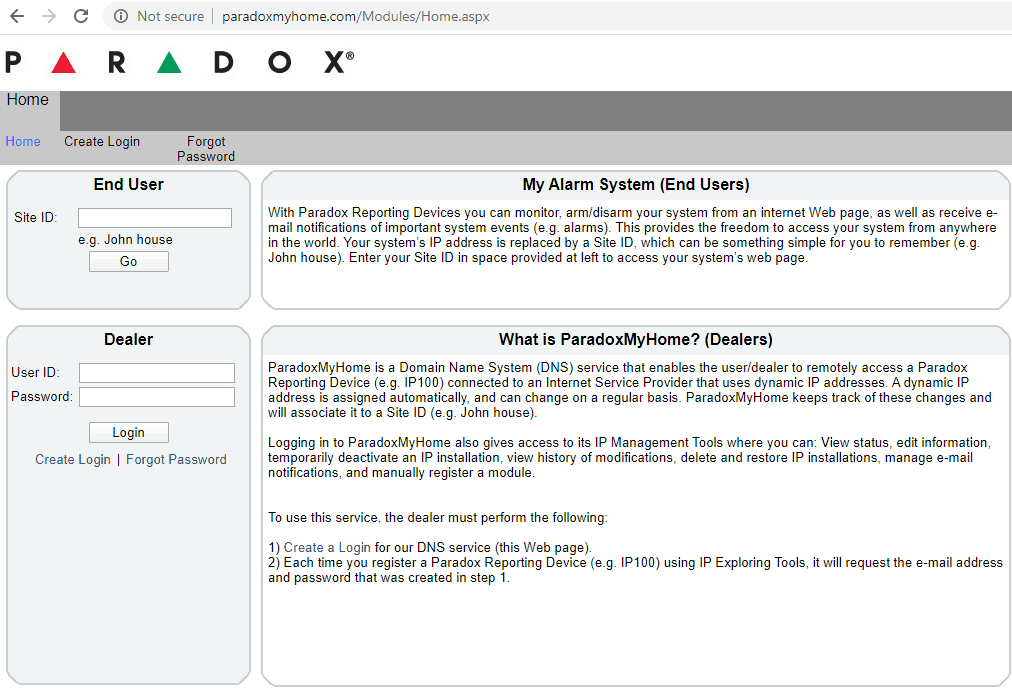
Why I chose not to register my Paradox IP150/Paradox Magellan MG5050 on paradoxmyhome.com
The paradoxmyhome.com website is a service that helps you control your Paradox alarm when you are away from home. I chose NOT to use this service for the following reasons:
- The Paradox app designed to control Paradox alarms looks outdated.
- From what I understand, once you register your alarm on the paradoxmyhome.com website, you will loose local access to the Paradox IP150 over the LAN.
- I prefer to control my devices over my LAN so I want to avoid using any cloud services like paradoxmyhome.com.
- I specifically want to integrate my Paradox Magellan MG5050 alarm panel with Home Assistant as this would allow me to do all sorts of cool stuff with my setup. E.g. Using motion sensors to turn on/off lights, detect when people are moving in the house to turn on the hot water ring main, tell me when I haven’t turn on the alarm but have left the house etc…
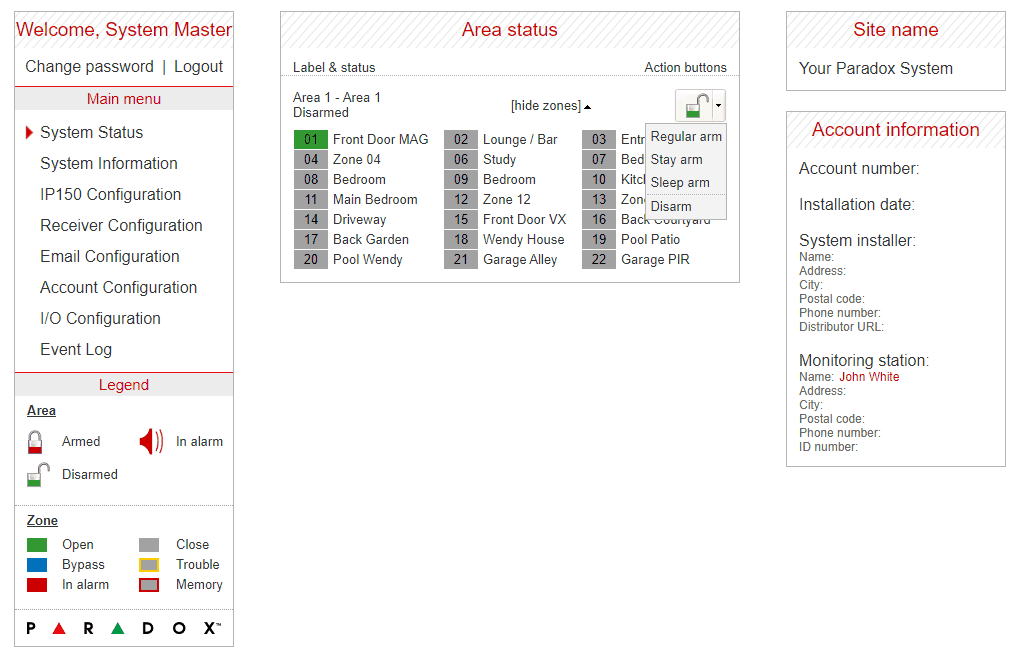
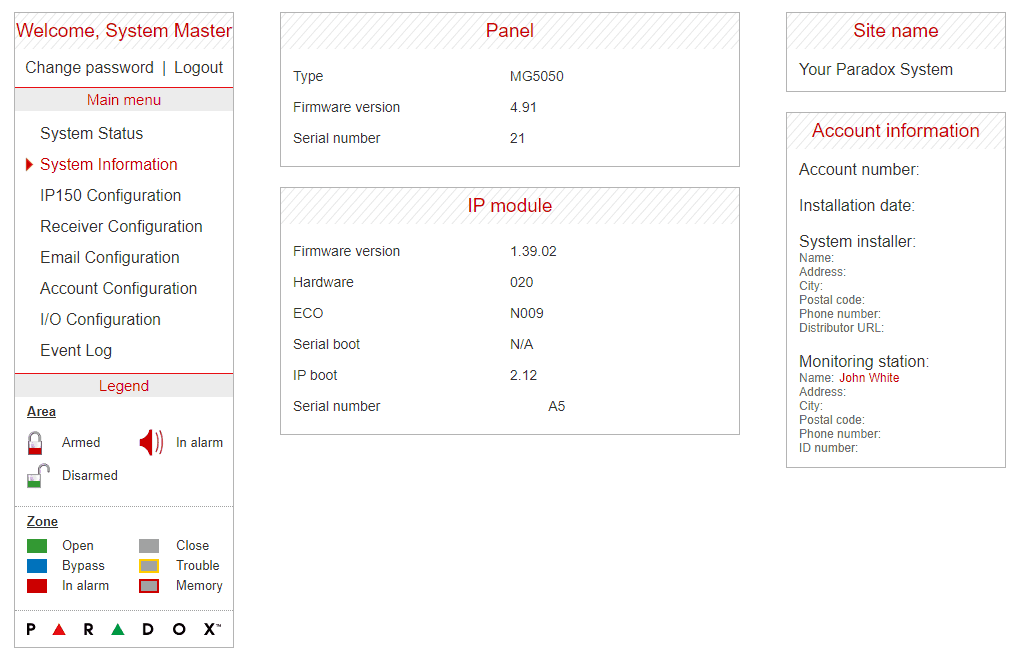
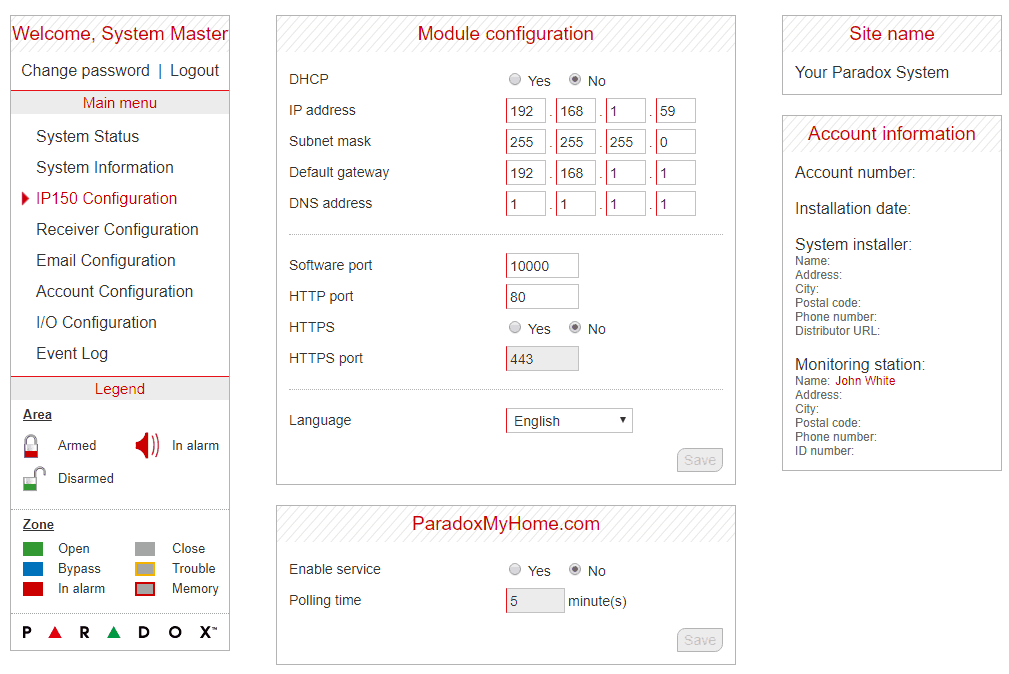
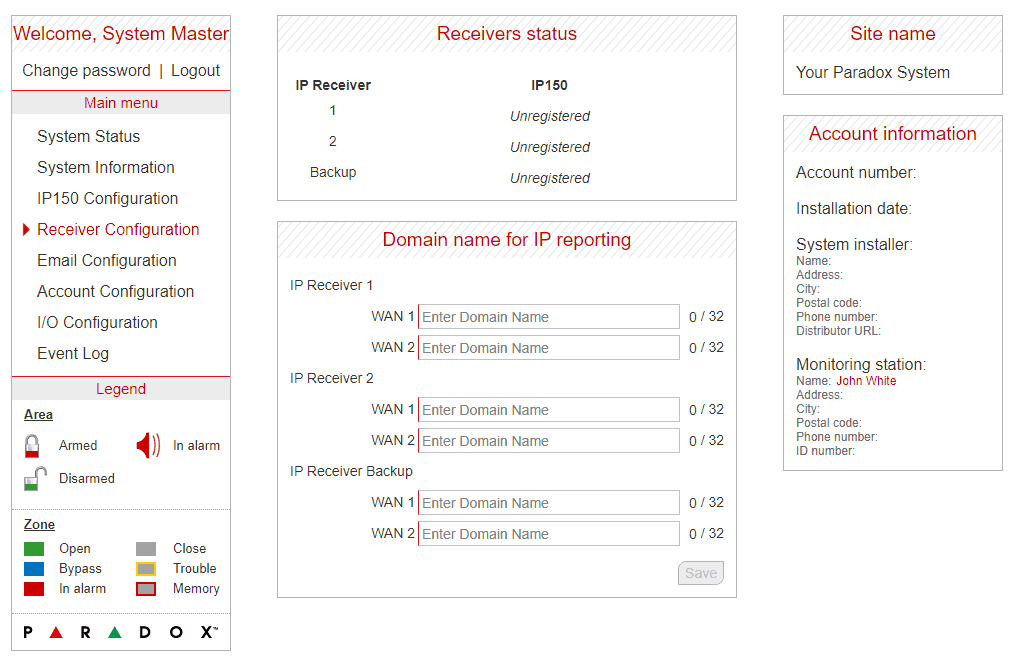
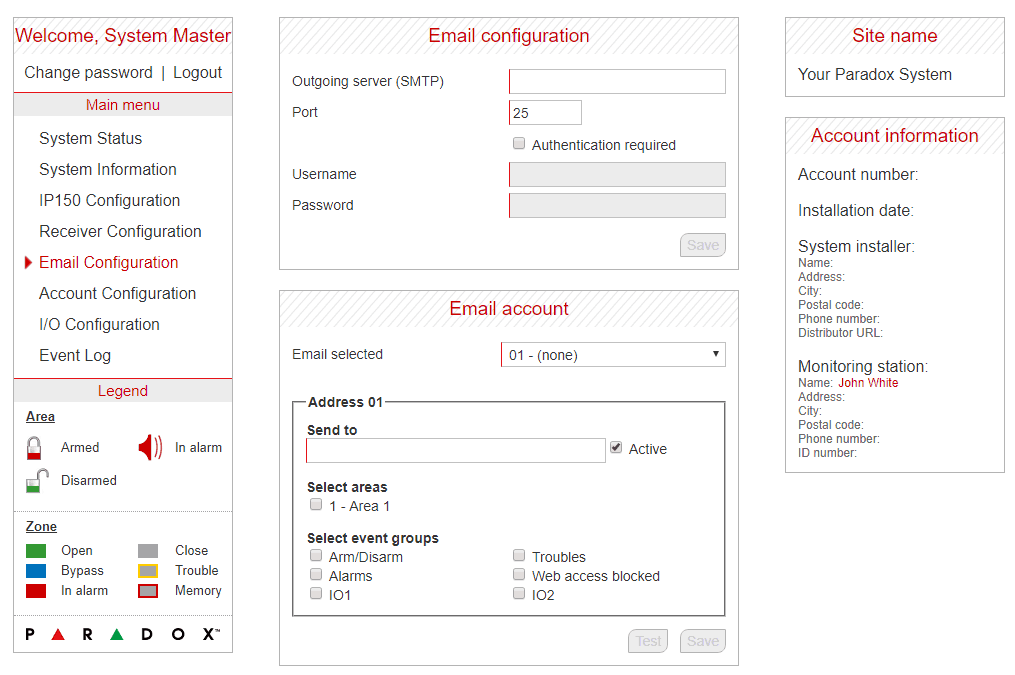
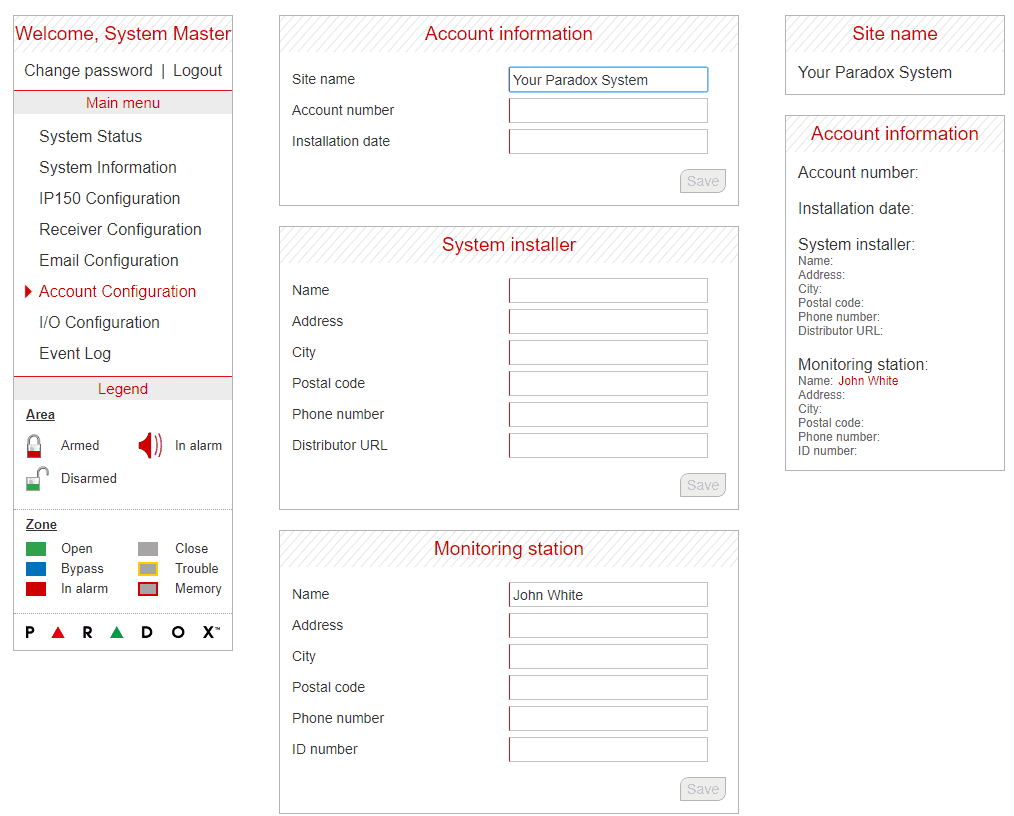
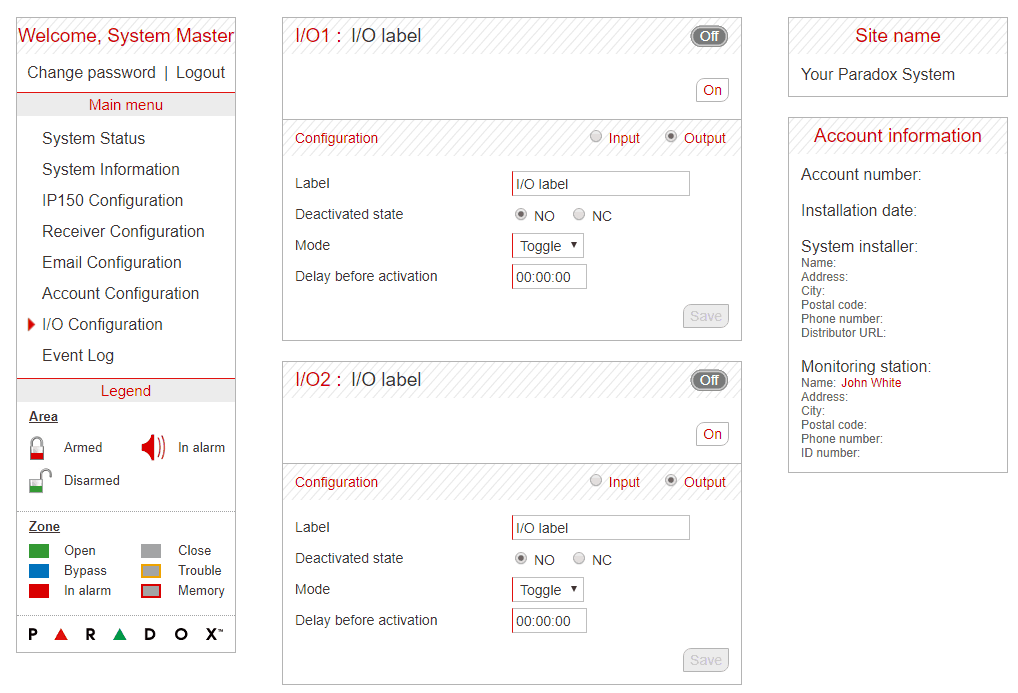
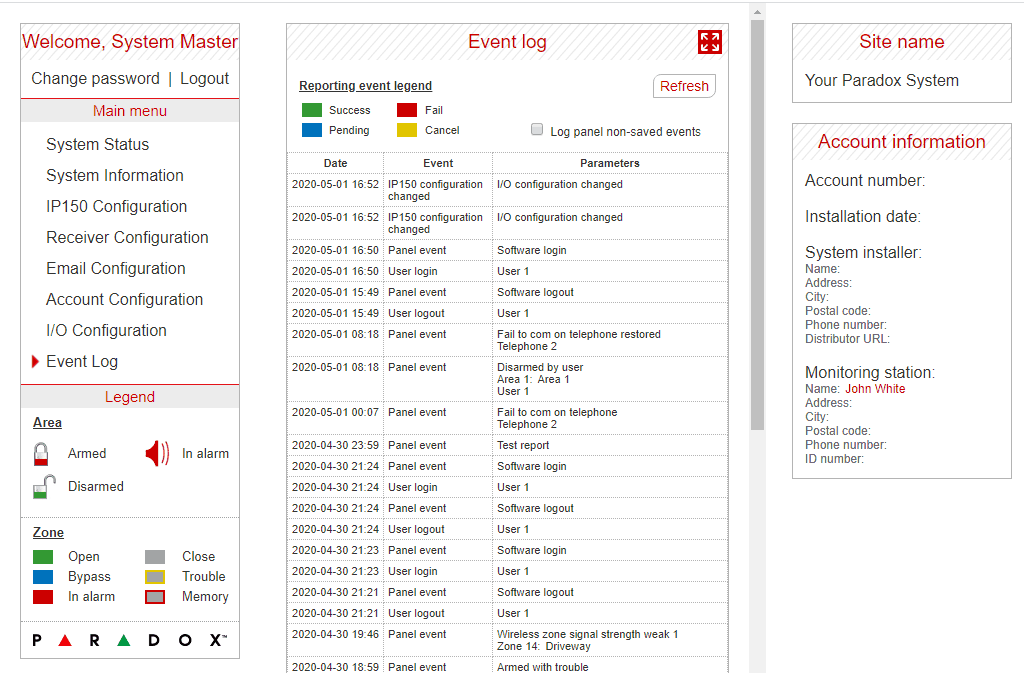
Step 5: The Paradox IP150 Web Interface
The only change I made in the screens was to the DHCP setting in the IP150 Configuration screen. See below.
IMPORTANT NOTICE: If you plan to link your Paradox IP150 to Home Assistant then make sure you logout of this web interface before connecting to Home Assistant. The Paradox IP150 only permits one connection at a time so if you have the web interface open, it will reject any connection attempts from Home Assistant and vice versa.
You can test that everything is working OK by checking is the state of your sensors change (my front door was open so highlighted in green) and arm/disarm your alarm using the ‘Action buttons’ menu as seen below on the System Status screen.
The only change I recall making was to change DHCP to No to make sure that the IP address of my Paradox IP150 did not change. You could probably leave this as Yes and just lock the IP address to the Paradox IP150 in your routers DHCP server.
If you want access to the Paradox IP150 from the internet (outside of your LAN) then take a look at the final section of the blog below.
Can I access my Paradox IP150 from the internet without a Site ID or paradoxmyhome.com?
I haven’t personally done this but I am 99% sure it will work. If you want access to the Paradox IP150 from the internet (outside of your LAN) then all you will need to do is use port forwarding on your router to route all traffic on port 80 (or a different port if you change it in the IP150 Configuration screen) to your the IP address used by your Paradox IP150. If you also setup a dynamic DNS service like Duck DNS, then you can access the Paradox IP150 using a URL rather than an IP address. This will allow you to load the Paradox IP150’s web interface from anywhere.
WARNING: Using port forwarding to access the Paradox IP150 from the internet will open it up to anyone to try and hack. It is for this reason, that I chose to keep my Paradox IP150 limited to my LAN and integrated with Home Assistant and then only open up Home Assistant to the internet. My thinking is that the Home Assistant community spends a massive amount of time making sure the platform is secure so I prefer to only expose my Home Assistant server to the internet and then let it control all the devices on my LAN. From what I understand, the best setup is to have all your IOT devices sitting on a vLAN with no internet access and then only provide Home Assistant with internet access.