Why integrate your Paradox alarm with Home Assistant?
Before we get into the step-by-step Paradox – Home Assistant integration guide, here are a few reasons why you should be integrating your alarm with Home Assistant.
If you have already started your journey with home automation and Home Assistant, then you will probably already know that sensors are an important part of your home automation setup. With this in mind, adding a handful of passive infrared sensors (PIR sensors) and open/close sensors to your home automation setup is a great way to start automating a whole bunch of new things without investing in a whole lot of new kit. All you need is a $100 Paradox IP150.
Here are some of the things that I have done with my Paradox – Home Assistant integration:
1. Controlling security lights with Paradox Alarm PIR sensors
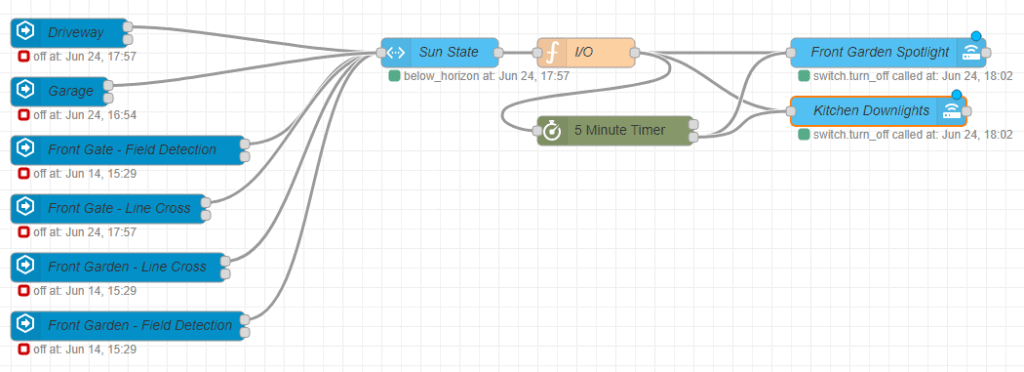
I use my PIR sensors to control my security lights and even internal lights in the house. So for example, if the sun has set (sensed using Node-RED Sun Events) and someone crosses one of the outside PIR beams in my garden, the outside security lights and some of my internal lights turn on. This would give an intruder the perception that someone is home and has seen them. It is also pretty handy having the spotlights turn on automatically when you are outside in the dark.
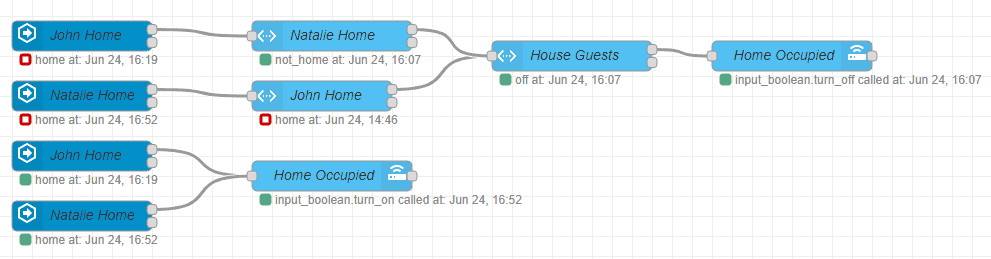
2. Sensing nobody is home and the alarm is not armed
My wife and I both have the Home Assistant app installed on our mobile phones. The Home Assistant app lets Home Assistant assistant server know when we are at or away from home.
This Node-RED flow then uses the home occupied/unoccupied state and the alarm armed/unarmed state to remind us to turn the alarm. So, if the alarm is unarmed, we are home and the sun has set, then we will be reminded to arm the alarm via a push notification to our phones.

3. Turning lights on when someone enters a room
If you have a PIR sensor in a room and a smart light in the same room, then there is no reason why you can’t turn the light on when someone enters the room. In combination with the Node-RED Sun Events node and a Stop Time node, you can automatically turn on the lights if the sun has set and someone enters the room and then automatically turn them off again after a set time of no activity! You could also create ‘Inside Activity’ states to turn on specific groups of lights based on activity in specific areas of your house.
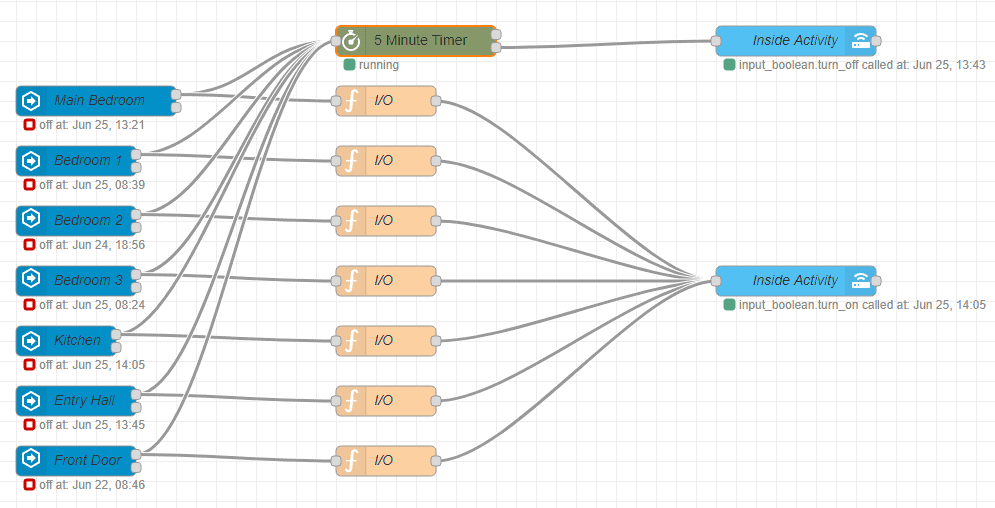
4. Sensing people are active in the house to keep hot water circulating in the ring main
I use my internal PIR sensors to determine if there is activity inside the house. The Inside Activity boolean is switched on by activity and then off again by the timer if there is no internal activity for 5 minutes. I use this Inside Activity boolean to turn my hot water ring main on and off according to activity in the house. This saves me electricity by only running the pump when necessary and my reducing heat loss through the ring main pipework in my ceiling.
Step 1: Setting up your Paradox IP150
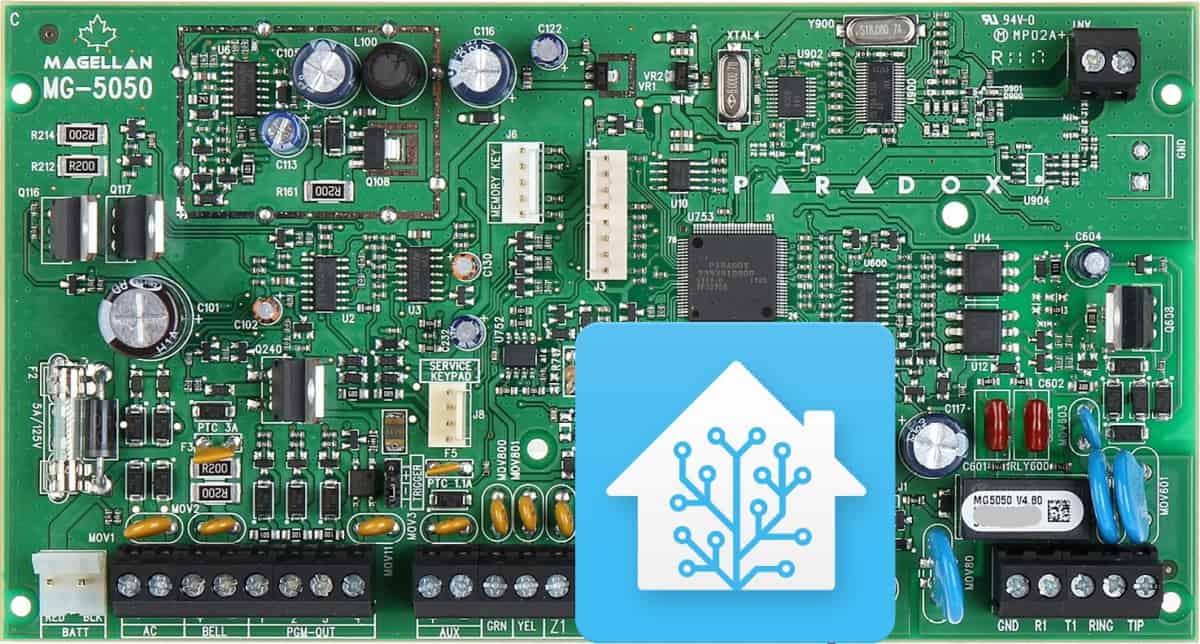
The Paradox IP150 is the IP device which connects your Paradox alarm panel to your local area network (LAN) and your Home Assistant server. You will need one of these to integrate Paradox alarm with Home Assistant. If you haven’t yet setup your Paradox IP150, then take a look at my step-by-step guide: How to setup the Paradox IP150
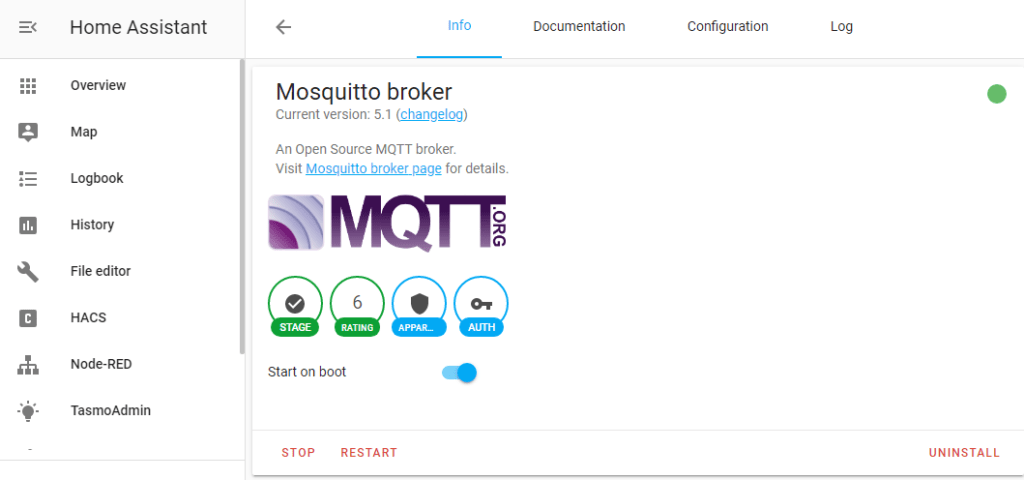
Step 2: Installing Mosquitto broker
Next, you will need to have a MQTT broker up and running. The MQTT broker is a service that acts as a post office or notice board for the states of devices using the service. For example, in the case of the Paradox alarm integration, the MQTT broker receives and reports state changes for entities such as PIR sensors. So if a PIR beam is set off, the Paradox IP150 will send a message to the MQTT broker to report a state change from inactive to active/movement. Any other services can then monitor the state of these changes and act accordingly.
Home Assistant has an add-on called Mosquitto broker which is the quickest and simplest way to get started. See the setup steps below.
- Follow these steps to get the add-on installed on your system:
- Navigate in your Home Assistant frontend to Supervisor -> Add-on Store.
- Find the “Mosquitto broker” add-on and click it.
- Click on the “INSTALL” button.
- Start the add-on.
- Have some patience and wait a couple of minutes.
- Check the add-on log output to see the result.
- Create a new user for MQTT
- Do this by browsing to Configuration in the left hand menu and then select Users (manage users)
- Click on the + in the bottom right and create a new user. I just used mqtt as the username.
- The user group need to be Administrators.
- To use the Mosquitto as a broker, you will need to integrate MQTT Broker into Home Assistant:
- Navigate in your Home Assistant Configuration -> Integrations.
- MQTT should appear as a discovered integration at the top of the page. If not, click + in the bottom right corner ad then search for MQTT.
- Select it and check the box to enable MQTT discovery if desired, and hit submit.
If you run into any issues, refer to the Documentation and Logs in the Mosquitto broker Add-on.
Step 3: Installing Paradox IP150 MQTT Adapter
Paradox IP150 MQTT Adapter is a Hassio add-on, Python and MQTT bindings for controlling a Paradox alarm via the IP150 web interface V3.
Dependencies: For best results, requires a Paradox IP150S with a firmware below 4.x. 1.x seems to work the best. It is worth considering to have your IP150S use the DNS from your router and then block access to 54.165.77.37 and upgrade.insightgoldatpmh.com as IP150’s have been known to upgrade their firmware automatically.
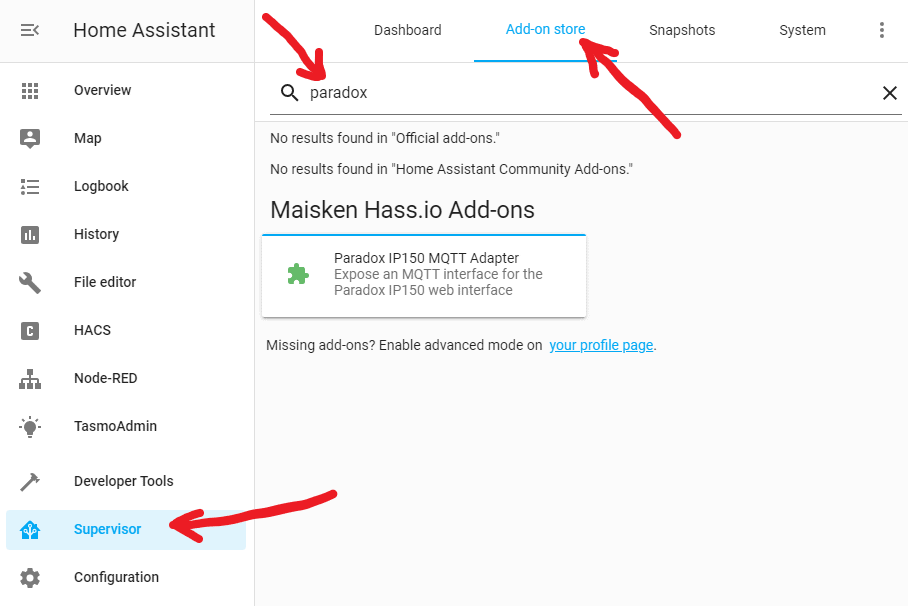
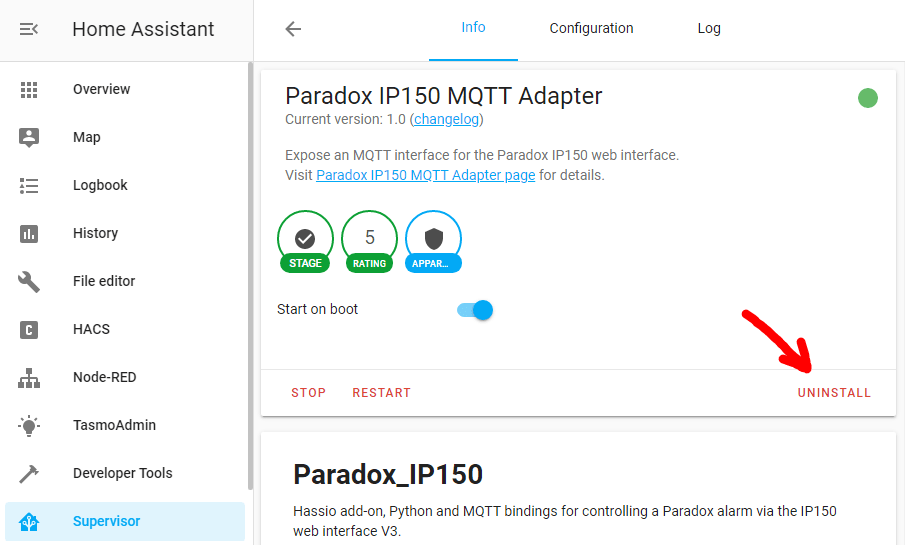
To install the Paradox IP150 MQTT Adapter, click on Supervisor/Hassio in the left hand manu, then select the ‘Add-on store’ and search for Paradox. Then just click on Paradox IP150 MQTT Adapter in the search results and hit install in the bottom right corner.
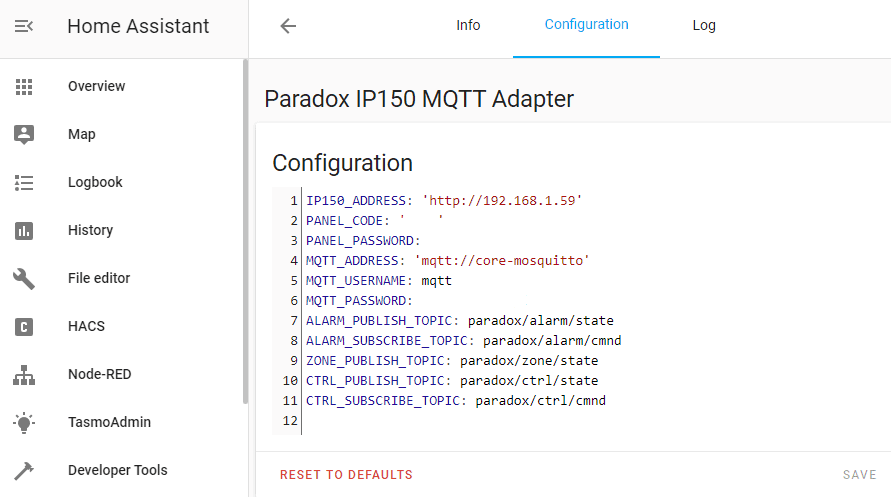
Once installed, open the Configuration settings in the top of the page and enter in the following information:
- IP150_ADDRESS: This is the IP address of your Paradox IP150 and must be enclosed in single inverted commas e.g. ‘http://192.168.1.59’
- PANEL_CODE: This is the 4 digit numeric keypad code you use to arm/disarm your alarm. e.g. ‘1234’
- PANEL_PASSWORD: The is the password you selected when configuring your Paradox IP150 and is not enclosed in single inverted commas. e.g. 12345678Abc!
- MQTT_ADDRESS: This is the address of your MQTT broker. If you are using the ‘Mosquitto broker’ Add-on I mentioned in Step 1, then this must be encased in single inverted commas e.g. ‘mqtt://core-mosquitto’
- MQTT_USERNAME: The username you chose (not enclosed in inverted commas) e.g. mqtt
- MQTT_PASSWORD: The mqtt password you chose (not enclosed in inverted commas) e.g. 12345678Abc!
Once you have entered all the configurations, navigate back to the Info pane on the ‘Paradox IP150 MQTT Adapter’ and click on Start to start the service. Make sure your MQTT broker service is also up and running before you do this. If you are having issues, click the Log tab in the Paradox IP150 MQTT Adapter add-on to help you troubleshoot.
I would also recommend turning ‘Start on boot’ on so that the service automatically starts if your Home Assistant service reboots.
Step 4: Updating your configuration.yaml with your MQTT and Paradox setting
You will need to update your configuration.yaml file with the following MQTT, alarm_control_panel and binary_sensor settings. You will need to update the following:
- MQTT username and password
- Update the name: “” in alarm_control_panel to that in your IP150 web interface
- Add and update the binary_sensor names so that all of your sensors are included. You can find these sensors and their name in your IP150 web interface
- Warning: The Paradox IP150 only allows one connection at a time so you will have to stop the ‘Paradox IP150 MQTT Adapter’ add-on in Home Assistant if you want to access these. And then restart it once you are done…
# MQTT
mqtt:
broker: 127.0.0.1
port: 1883
client_id: home-assistant-John
username: !secret mqtt_username
password: !secret mqtt_password
# Paradox alarm system
alarm_control_panel:
- platform: mqtt
name: "House Paradox"
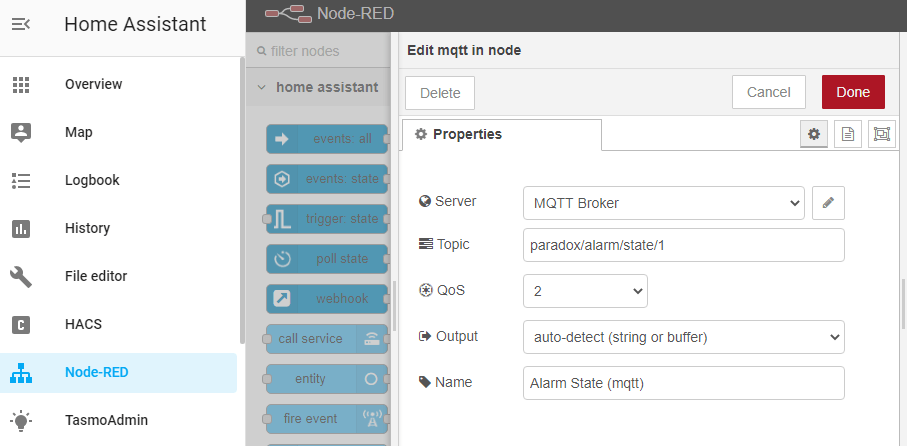
state_topic: "paradox/alarm/state/1"
command_topic: "paradox/alarm/cmnd/1"
qos: 1
availability_topic: "paradox/ctrl/state"
payload_available: "Connected"
payload_not_available: "Disconnected"
payload_disarm: "DISARM"
payload_arm_home: "ARM_HOME"
payload_arm_away: "ARM_AWAY"
payload_arm_night: "ARM_NIGHT"
#code: !secret panel_code
# Load all binary sensors
binary_sensor:
- platform: mqtt
state_topic: "paradox/zone/state/1"
name: "Front Door MAG"
qos: 1
payload_on: "on"
payload_off: "off"
availability_topic: "paradox/ctrl/state"
payload_available: "Connected"
payload_not_available: "Disconnected"
device_class: door
- platform: mqtt
state_topic: "paradox/zone/state/2"
name: "Lounge / Bar"
qos: 1
payload_on: "on"
payload_off: "off"
availability_topic: "paradox/ctrl/state"
payload_available: "Connected"
payload_not_available: "Disconnected"
device_class: motion
- platform: mqtt
state_topic: "paradox/zone/state/3"
name: "Entry Hall"
qos: 1
payload_on: "on"
payload_off: "off"
availability_topic: "paradox/ctrl/state"
payload_available: "Connected"
payload_not_available: "Disconnected"
device_class: motion
Finally you will need to restart your Home Assistant server…
Step 5: Check everything is working
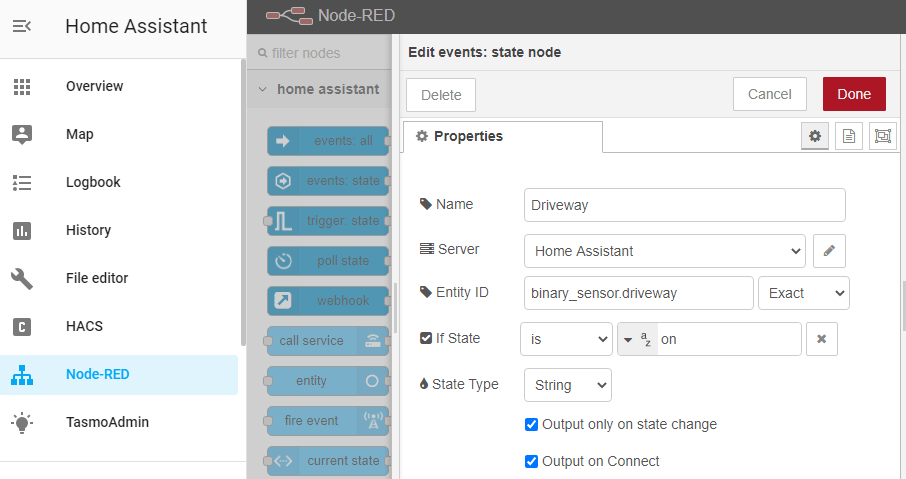
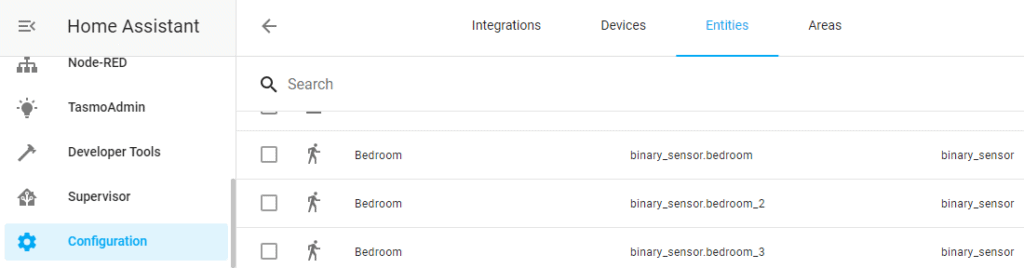
After following the above steps, your MQTT broker should be up and running and being updated with the states from your Paradox Alarm’s entities. To check all is working as expected, browse to Configuration in the left hand menu, then select Entities from the top tabs and you should see your PIR’s and open/close sensors showing. E.g. binary_sensor.bedroom
Step 6: Start using
Now that you have everything setup, you can start using Node-RED to start automating all sorts of fun stuff!