In the past, if you wanted to get your Sonoff devices working with Home Assistant, then you would have no choice but to flash them with custom firmware such Tasmota. However, with the development of the Sonoff LAN integration for Home Assistant (by AlexxIT), you are now able to use most of your existing Sonoff devices with Home Assistant without custom firmware such as Tasmota.
The Sonoff LAN integration into Home Assistant allows your Home Assistant setup to interface directly with your Sonoff devices over your local area network (LAN Mode) without routing though the eWeLink servers. This means that your Sonoff devices will work over your local area network even if you don’t have a working internet connection. You will however still need to pair your Sonoff devices with the eWeLink app during the initial setup. After that is done though, you can block access to the eWeLink services in your router (if you have privacy concerns) and your Sonoff devices will continue to function though Home Assistant. I chose not to block access to the eWeLink servers as I do use the app from time to time.
For the full list of supported Sonoff devices, visit the AlexxIT GitHub page.
Sonoff LAN: Step-by-step installation instructions
The best way to install the Sonoff Lan integration is via the Installing the Home Assistant Community Store (HACS). HACS works by pulling custom integrations, plugins and themes off the GitHub repositories in which they are stored. It then cleverly manages the installation and updates of these custom integrations, plugins and themes via a nice GUI. So, before we install Sonoff lan, we will need to setup Home Assistant Community Store (HACS).
Installing the Home Assistant Community Store (HACS)
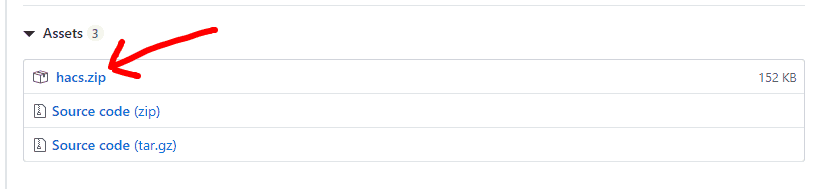
Step 1: Downloading hacs.zip from GitHub
Go to the HACS GitHub repository in the link below and download the repository hacs.zip file at the bottom of the page under the ‘Assets’ heading: https://github.com/hacs/integration/releases/latest
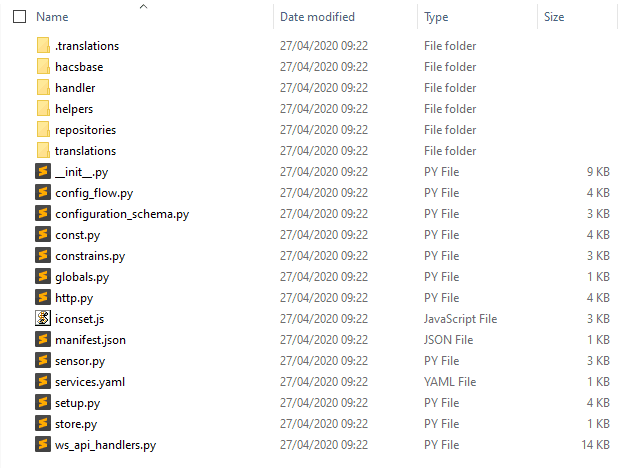
Step 2: Extracting the hacs.zip file
Extract the hacs.zip file to give you a hacs folder with the following files.
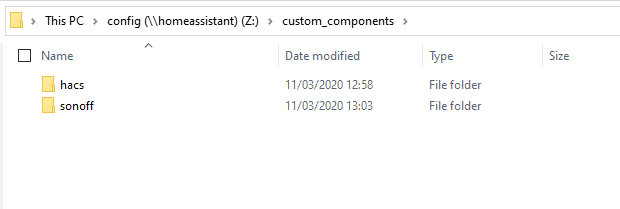
Step 3: Copying the hacs folder to Home Assistant
Now you need to copy the hacs folder (from the extracted hacs.zip) and paste it into the custom_components folder in your Home Assistant setup. If you don’t already have a custom_components folder in your Home Assistant folder, then you can just create it yourself.
Now restart your Home Assistant server
I use the ‘Samba share’ Official add-on which creates a network drive of my Home Assistant config directory. This makes it really easy to copy files from your PC to your Home Assistant setup.
Step 4: Creating a GitHub Token
HACS programatically interfaces with GitHub in order to manage the installation and updates of these custom integrations, plugins and themes via a nice GUI. To do this HACS needs a GitHub Token to be generated to that your Home Assistant server can issue commands to GitHub.
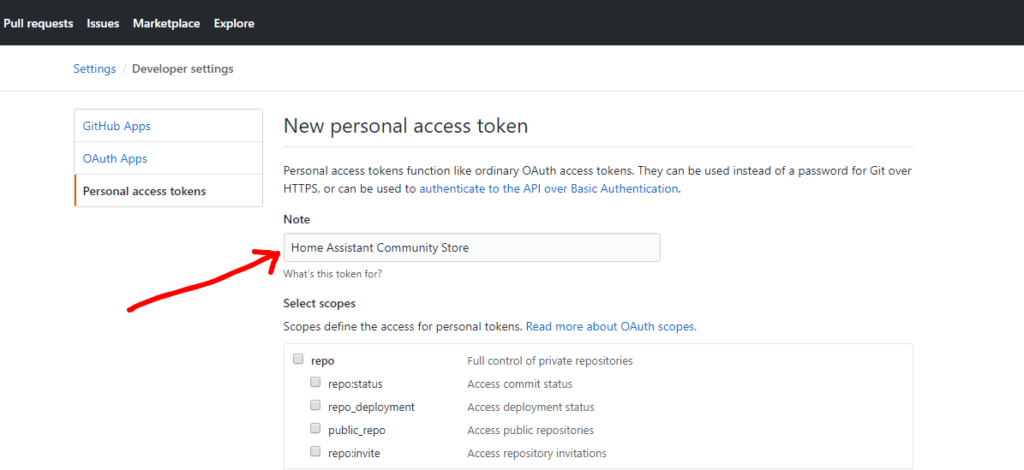
To Generate a GitHub token, create a GitHub account if you don’t already have one and then open Settings, Developer settings, Personal access tokens or just clock on the following URL: https://github.com/settings/tokens
Next you will need to click on the ‘Generate new token’ button, name your token and then click the ‘Generate token’ button at the bottom of the page.
Then make a copy of the token that is generated. Don’t loose this as the taken will only be shown to you once on this screen.
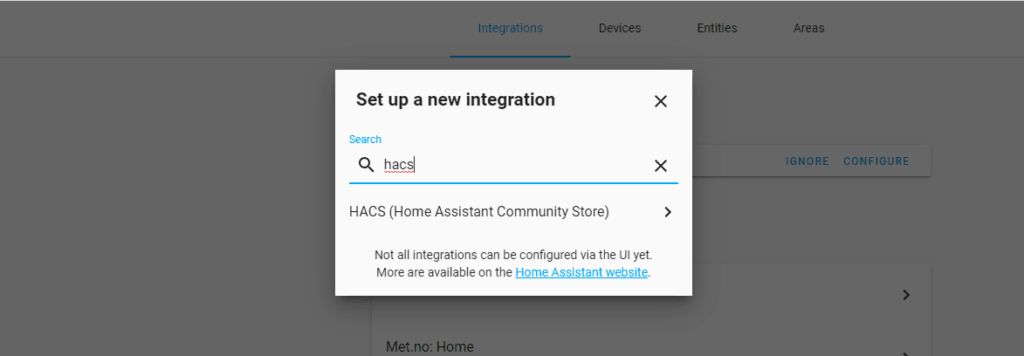
Step 5: Adding the HACS Integration
To setup the HACS integration, open up your Home Assistant , click on Configuration, Integrations and then the big orange + button in the bottom right of the screen. Search for HACS, click on HACS (Home Assistant Community Store) and then open the configuration screen.
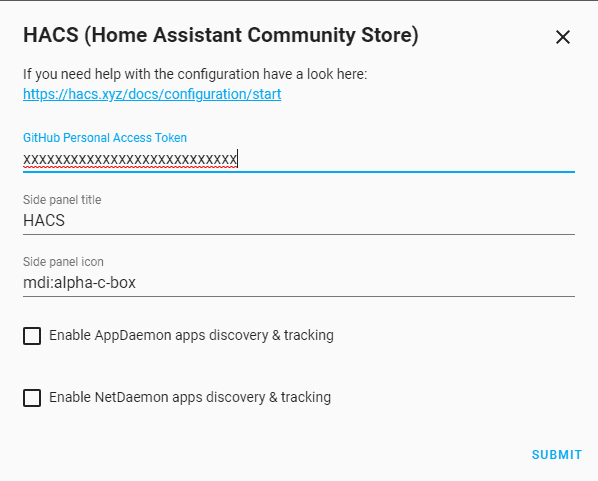
Now, simply paste in your GitHub access token from Step 4, select the check boxes in the configuration screen and click the submit button.
Once complete, you will notice that HACS will appear in your Home Assistant menu bar. Then just wait for HACS to update all the repositories associated with Home Assistant. Once that is complete, just read the onboarding screens.
Installing Sonoff LAN in HACS
Now that you have the HACS integration installed, you can make a start installing Sonoff LAN.
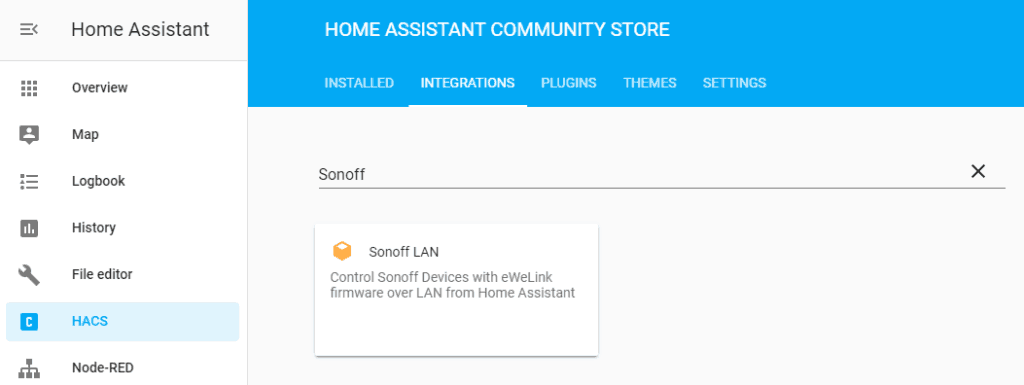
Step 1: Searching for the Sonoff LAN integration in HACS
Click on HACS in the Home Assistant menu bar, then click on Integrations in the top menu and search for Sonoff. This will display the Sonoff LAN integration. Click on this to open Sonoff LAN.
Step 2: Install Sonoff LAN integration
Next, click on install to install Sonoff LAN on your Home Assistant server.
Step 3: Updating your Configuration file
Next you will need to update your Home Assistant configuration.yaml file to include the following lines. This configuration allow the Sonoff LAN integration to login to your eWeLink account and retrieve all of your Sonoff devices. The parameter ‘reload: always’ will reload Sonoff devices every time you restart Home Assistant and ‘reload: once’ will only load Sonoff devices the first time you start the Sonoff LAN integration.
# Unflashed SONOFF devices
sonoff:
  username: !secret sonoff_username
  password: !secret sonoff_password
  reload: always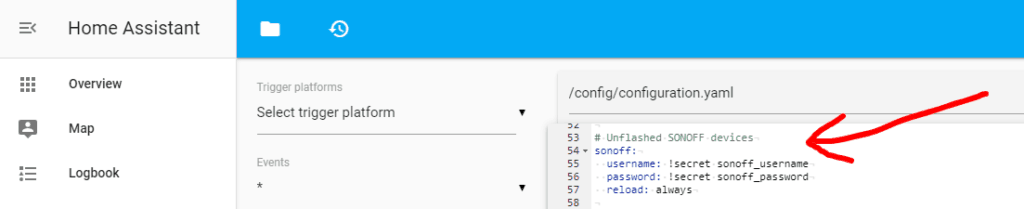
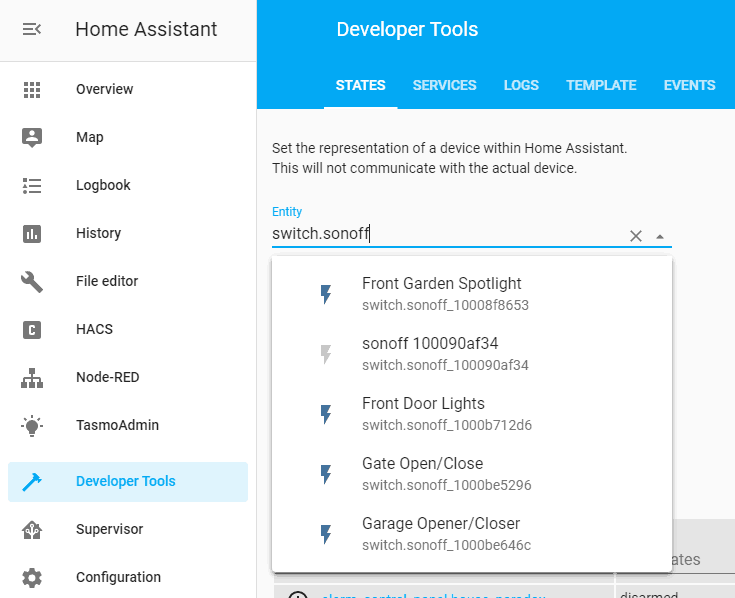
Step 4: Restart Home Assistant and search for Sonoff devices
Restart Home Assistant and search for Sonoff devices on your Home Assistant, Developer Tools, States. You should see a list of all of your Sonoff devices 🙂