
What is Geo Library for Amazon DynamoDB?
The Geo Library for Amazon DynamoDB enables developers to easily and efficiently create and query geospatial data. It does this by creating geohash indexes from coordinate-based point of interests and then using those geohash indexes to perform location-based queries over the DynamoDB table. This is an exceptionally quick and efficient way of querying location-based databases.
The dynamodb-geo library was written in Java and C++ but it has subsequently been ported to Python and Javascript. As you will see in my examples below, I made use of the Python library.
If you are interested in understanding geohashing in more detail, then take a look at the video below.
How is the Geo Library for Amazon DynamoDB used?
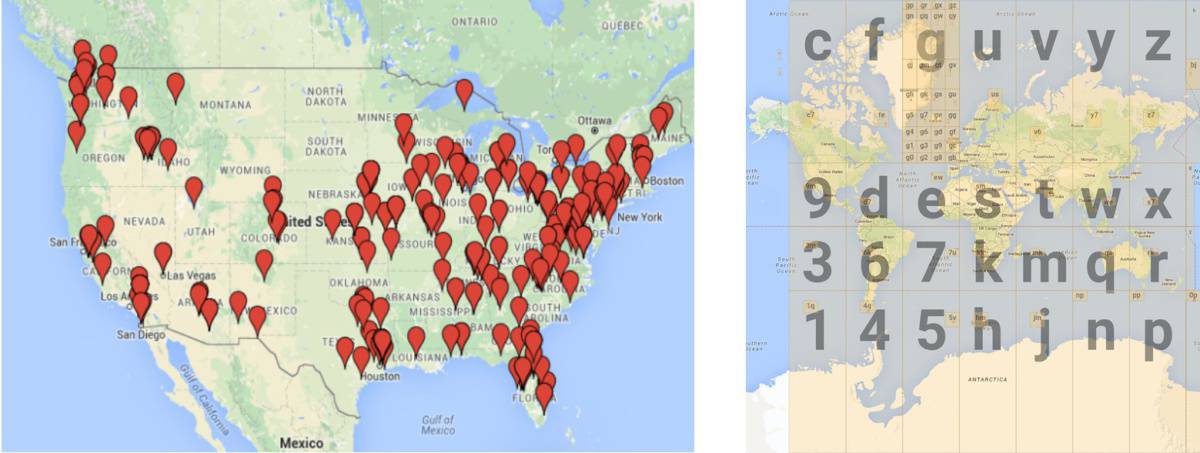
Imagine you have a massive database tourism related points of interest. You want to be able to query this database with millisecond latency and pull all the points on interest that occur within a 1 mile radius of a specific GPS point so that you can display them on a map. Also imagine that you have a small budget for this service initially where you only pay if it is used but you want the service to scale infinitely when required. These requirements may seem like a big ask but they are being asked by more and more companies these days.
Why use DynamoDB to create and query geospatial data?
Geo Library for Amazon DynamoDB is a good choice for perform location-based queries when you are interested in:
- Massive scale: You will never have to worry about having enough capacity to meet you needs. DynamoDB is used by huge companies such as Airbnb, Lyft, and Duolingo.
- Serverless: You don’t have to maintain any infrastructure
- Performance: DynamoDB is capable of delivering single-digit millisecond performance at any scale
- Cost: A very cost effective way to scale as you only pay for what you use if you choose the on demand pricing. As you grow you can then switch to provisioned pricing if it justifies the cost.
Creating, populating and querying a DynamoDB Geo database with the Geo Library.
Step 1: Installing Geo Library for Amazon DynamoDB and its dependencies
As I made use of the Python dynamodb-geo library, I created a new environment in Anaconda (you could also just use an existing environment), opened a terminal for the environment and then pip installed the following three packages:
pip install s2sphere
pip install boto3
pip install dynamodbgeo
If you haven’t used Anaconda before, it is a free and open-source distribution of the Python and R programming languages for scientific computing, that aims to simplify package management and deployment. I highly recommend using Anaconda if you are dabbling in Python development.
Step 2: Choosing a hashKey Length (optimising for performance and cost)
The hashKey is the Primary partition key for the DynamoDB table and it’s length is configured when you create a DynamoDB table using the Geo library in Step 3 below. The hashKey is directly created from the geohash based on the predefined key length you define. The length of the hashKey is important because it acts as the mechanism for grouping locality records. If you choose a long hashkey, then the localities in a small area will be grouped together. If you choose a short hashKey, then localities covering a large area will be grouped together.
Choosing between a long or short hashKey is important for two reasons. The first is because you cannot change the hashKey length once the table is created. The second is because it will impact the cost and performance of your geo database. Choosing the right hashKey length is a function of how many locality datapoints you have and how densely the localities are grouped together.
If you have millions of localities that are densely grouped together, then you probably need to be selecting a longer length hashKey. By doing this, you will have more hashKeys that divide your localities up into smaller groups. This means that when you query a locality, your queries will return smaller chunks of locality data. This will improve performance and lower costs because at higher zoom levels on a map, you don’t want to be loading data that you can’t see on the screen. By doing so, the amount of data transferred will be smaller (therefore cheaper) and you will only be seeing the localities that are actually going to be viewed.
If on the other hand you have fewer less dense localities, then you would want to go for a shorter hashKey length. In doing so you will only need a single query to return the few localities that are distributed over a larger area. If you were to use a long hashKey in this situation, you would need many queries (more costly) to return the same data that a single short hashKey would accomplish.
Step 3: Creating a table using the Geo Library for Amazon DynamoDB
The dynamodb-geo library automatically creates a hashKey, rangeKey, geoJson and geohash fields for each location (set of latitude and longitude coordinates) you create.
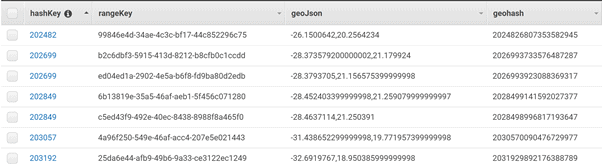
The hashKey is the Primary partition key for the DynamoDB table, it is created from the geohash and it is used to group all the coordinate-based point of interests that are in a similar location. The geoHash is the 19 character high accuracy identifier for the coordinates of a locality and it calculated directly off the geoJson coordinates of the locality. The rangeKey is simply a unique key that is assigned to every locality so that you can have multiple unique localities, all with the same coordinates.
import boto3
import dynamodbgeo
import uuid

# Import the AWS sdk and set up your DynamoDB connection
dynamodb = boto3.client('dynamodb', region_name='us-east-2')

# Create an instance of GeoDataManagerConfiguration for each geospatial table you wish to interact with
config = dynamodbgeo.GeoDataManagerConfiguration(dynamodb, 'my_table_name')

# Initiate a manager to query and write to the table using this config object
geoDataManager = dynamodbgeo.GeoDataManager(config)
GeoTableUtil has a static method getCreateTableRequest for helping you prepare a DynamoDB CreateTable request request, given a GeoDataManagerConfiguration.
The create_table_input object is a dictionary of settings used to configure the new table being created. If you want to have provisioned throughput to your DynamoDB table, then you can leave the settings as is and just edit the read capacity units.
# Pick a hashKeyLength appropriate to your usage
config.hashKeyLength = 3

# Use GeoTableUtil to help construct a CreateTableInput.
table_util = dynamodbgeo.GeoTableUtil(config)
create_table_input=table_util.getCreateTableRequest()

#tweaking the base table parameters as a dict
create_table_input["ProvisionedThroughput"]['ReadCapacityUnits']=5

# Use GeoTableUtil to create the table
table_util.create_table(create_table_input)
I my case, I didn’t want any provisioned throughput so I changed my table billing to on demand via the AWS web control panel. I couldn’t find the relevant settings (for the create_table_input dictionary) to configure the new table to be setup with on demand billing. If anyone know how to do this, please let me know how.
Step 4: Populating a DynamoDB Geo table using the Geo Library
Once you have created a DynamoDB Geo table using the Geo Library, you can move onto populating the table with your data.
#preparing non key attributes for the item to add

PutItemInput = {
        'Item': {
            'Country': {'S': "Tunisia"},
            'Capital': {'S': "Tunis"},
            'year': {'S': '2020'}
        },
        'ConditionExpression': "attribute_not_exists(hashKey)" # ... Anything else to pass through to `putItem`, eg ConditionExpression

}
geoDataManager.put_Point(dynamodbgeo.PutPointInput(
        dynamodbgeo.GeoPoint(36.879163, 10.243120), # latitude then latitude longitude
         str( uuid.uuid4()), # Use this to ensure uniqueness of the hash/range pairs.
         PutItemInput # pass the dict here
        ))
As you can see from the code snippet above, PutItemInput dictionary contains all the locality specific information that you want to include. This could be any information you choose such as the Country, Province/State, dates and pretty much any other data that you can think of.
The hashKey, geoJson and geohash fields on the other hand are created directly off the coordinates that you enter pass in for any particular coordinate and the rangeKey is the unique key created for each locality created.
Step 4: Updating/editing a locality record in a DynamoDB Geo table
If you need to edit a locality record, you can only edit the non-location fields for a record. If you need to edit the coordinates for a locality record, then you will need to first delete the record and then create a new record. This is because the HashKey and geohash as specific to the coordinates you used to create the record.
To edit the non-location fields for a record, you must specify a RangeKeyValue, a GeoPoint, and an UpdateItemInput dict. See below.
#define a dict of the item to update
UpdateItemDict= { # Dont provide TableName and Key, they are filled in for you
        "UpdateExpression": "set Capital = :val1",
        "ConditionExpression": "Capital = :val2",
        "ExpressionAttributeValues": {
            ":val1": {"S": "Tunis"},
            ":val2": {"S": "Ariana"}
        },
        "ReturnValues": "ALL_NEW"
}
geoDataManager.update_Point(dynamodbgeo.UpdateItemInput(
        dynamodbgeo.GeoPoint(36.879163,10.24312), # latitude then latitude longitude
         "1e955491-d8ba-483d-b7ab-98370a8acf82", # Use this to ensure uniqueness of the hash/range pairs.
         UpdateItemDict # pass the dict that contain the remaining parameters here
         ))
Step 5: Deleting a locality record in a DynamoDB Geo table
To delete a record, you must specify the RangeKeyValue and a GeoPoint for the record. See below.
# Preparing dict of the item to delete
DeleteItemDict= {
            "ConditionExpression": "attribute_exists(Country)",
            "ReturnValues": "ALL_OLD"
            # Don't put keys here, they will be generated for you implecitly
        }
geoDataManager.delete_Point(
    dynamodbgeo.DeleteItemInput(
    dynamodbgeo.GeoPoint(36.879163,10.24312), # latitude then latitude longitude
        "0df9742f-619b-49e5-b79e-9fb94279d30c", # Use this to ensure uniqueness of the hash/range pairs.
        DeleteItemDict # pass the dict that contain the remaining parameters here
        ))
Step 6: Querying a DynamoDB Geo table using the Geo Library
There are two ways in which you can query a DynamoDB Geo table using the Geo Library. The first is using a rectangular query where you define MinPoint and MaxPoint coordinates and it returns all the localities that fall within the rectangle. The second is a circular query where you define a centre point coordinates and a diameter and it returns all the localities that fall within the circle.
Rectangular query on a DynamoDB Geo table using the Geo Library
You can perform a rectangle query by specifying a MinPoint and MaxPoint. You can also pass filtering criteria in a dictionary to filter by your custom fields. See below.
# Querying a rectangle
QueryRectangleInput={
        "FilterExpression": "Country = :val1",
        "ExpressionAttributeValues": {
            ":val1": {"S": "Italy"},
        }
    }
print(geoDataManager.queryRectangle(
        dynamodbgeo.QueryRectangleRequest(
            dynamodbgeo.GeoPoint(36.878184, 10.242358),
            dynamodbgeo.GeoPoint(36.879317, 10.243648),QueryRectangleInput)))
Circular query on a DynamoDB Geo table using the Geo Library
To query via a circle, you specifying a CenterPoint and RadiusInMeter. You can also pass filtering criteria in a dictionary to filter by your custom fields. See below.
# Querying 95 meter from the center point (36.879131, 10.243057)
QueryRadiusInput={
        "FilterExpression": "Country = :val1",
        "ExpressionAttributeValues": {
            ":val1": {"S": "Italy"},
        }
    }

query_reduis_result=geoDataManager.queryRadius(
    dynamodbgeo.QueryRadiusRequest(
        dynamodbgeo.GeoPoint(36.879131, 10.243057), # center point
        95, QueryRadiusInput, sort = True)) # diameter
Building an DynamoDB Geo API with AWS Lambda & API Gateway
Step 1: Creating a package for Lambda
The AWS Lambda Python installation only has the boto3 package installed. If you want to use any other packages, then you need to install them (on your machine) in a predefined folder that contains your lambda_function.py file and then upload a zip of this folder to your lambda function. You can do this as follows:
- Create a folder in which you want to install the s2sphere and dynamodbgeo libraries.
- Paste your lambda_function.py file into the folder.
- Open your preferred command line and create a temporary folder (e.g. install_folder as below) to hold the package files.
- Install the packages you need into this folder by opening the temp folder and running the following commands below in your command line.
pip install s2sphere -t \install_folder
pip install dynamodbgeo -t \install_folder
If you create a zipped deployment package that is more than 3MB, then you will loose the ability to edit your lambda_function.py inline in the Lambda web console. The package I created with s2sphere and dynamodbgeo was over 10MB so I was unable to edit my lambda_function.py inline. This is not the end of the world though, you will just have to edit your lambda_function.py in a code editor and then re-zip and upload your package every time you make a change to your lambda function code.
Step 2: Write a Lambda Function to query your DynamoDB database
To get your DynamoDB database linked up to an API, you will first need to write a Lambda Function that will be triggered by your API. When this function is triggered by the API, it accepts the coordinates (and MinPoint and MaxPoint or circle diameter if you choose) and queries the DynamoDB table using these parameters, and then returns the query outputs to the API.
It can be a bit tricky coding your lambda function to receive parameters from API Gateway (coordinates, MinPoint and MaxPoint or circle diameter), query the DynamoDB table and then return the results to the API. Give me a shout on LinkedIn if you need help with this.
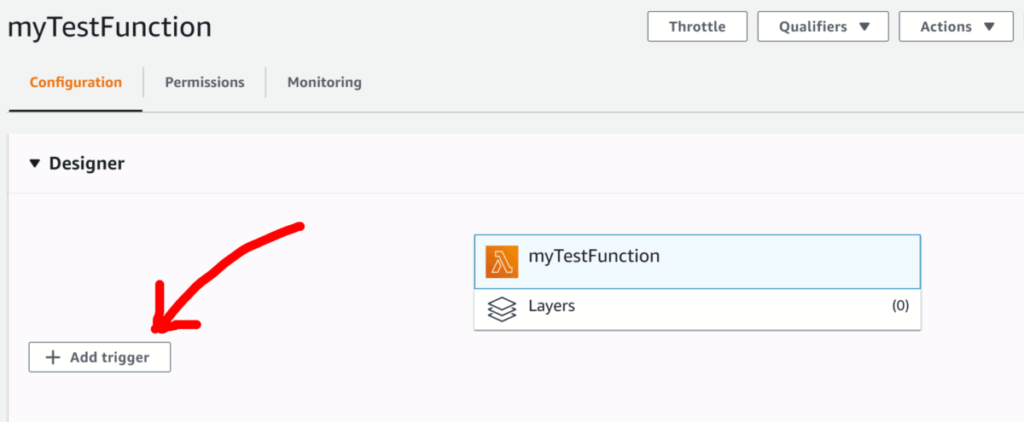
Step 3: Connecting your Lambda Function to AWS API Gateway
If you already have an existing API setup in API Gateway, then linking your Lambda Function is as simple as adding a trigger, selecting API Gateway as the trigger and then choosing your API from the drop-down list. Alternatively, you can also just create a new API directly from the same drop-down list.

Once I had my API configured, this is the format of the API URL:
https://api.domain.com/v1/mytestfunction?lat=-34.1&long=18.5&radius=10000Triggering the API via this URL then returns a list of dictionaries where each dictionary is a locality record that falls within the 10,000 meter radius around the coordinates passed in.
I hope that you found this blog useful. If you have any questions or suggestions, get in touch with my via LinkedIn 🙂